As a long-time printer enthusiast and repair technician, I’ve seen my fair share of clogged print heads. It’s a common problem that can be incredibly frustrating for printer owners. Over the years, I’ve tried just about every cleaning method out there to get print heads working again. Recently, I decided to experiment with using ultrasonic cleaners to clean print heads. I was curious if this method could effectively remove stubborn clogs without damaging delicate print head components. After extensive testing on various printer models, I’m excited to share my first-hand experiences and insights on using ultrasonic cleaners for print head maintenance.
Ultrasonic cleaners use high-frequency sound waves to create tiny bubbles in a cleaning solution. When these bubbles collapse, they create powerful shock waves that can dislodge dirt and debris. It’s an intriguing technology that’s used to clean everything from jewelry to surgical instruments. But can it safely and effectively clean print heads? That’s the key question I set out to answer through hands-on testing.
I’ll admit I was skeptical at first about submerging expensive print heads in an ultrasonic bath. Print heads contain incredibly fine nozzles and sensitive electronic components. The last thing I wanted was to damage them beyond repair. But after researching the technology and starting with some careful experiments, I became more confident in the process. I found that when done properly, ultrasonic cleaning can be a highly effective way to remove even the most stubborn ink clogs.
In this in-depth guide, I’ll walk you through everything I’ve learned about using ultrasonic cleaners on print heads. I’ll cover the pros and cons, share step-by-step instructions, and offer tips to get the best results. Whether you’re a printer repair professional or a regular user dealing with clogged heads, you’ll find practical advice based on my real-world testing. I’ll explain the process in simple terms that even a beginner can follow. By the end, you’ll have a clear understanding of whether ultrasonic cleaning is right for your print head problems.
What Are Ultrasonic Cleaners and How Do They Work?
Ultrasonic cleaners may sound high-tech, but the concept is pretty simple. These devices use sound waves to clean objects placed in a liquid bath. Let me break down how they work in easy-to-understand terms.
How Ultrasonic Cleaners Create Cleaning Action
Ultrasonic cleaners have a metal tub that you fill with water or a cleaning solution. At the bottom of the tub are special devices called transducers. When you turn on the cleaner, these transducers vibrate very fast – faster than we can hear. This creates sound waves in the liquid.
As the sound waves move through the liquid, they make tons of tiny bubbles. These bubbles are so small you can’t see them. When the bubbles pop, they make tiny shock waves in the liquid. It’s these shock waves that do the cleaning. They blast away dirt and gunk from whatever object you put in the cleaner.
Why Ultrasonic Cleaning Works Well for Small Parts
The neat thing about ultrasonic cleaners is they can clean all the nooks and crannies of complex objects. The bubbles get into tiny spaces regular cleaning can’t reach. That’s why they work so well for things like jewelry or small machine parts.
Print heads have super tiny holes where the ink comes out. Over time, dried ink can clog these holes. An ultrasonic cleaner can blast away these clogs without needing to scrub or poke at the delicate print head.
Different Types of Ultrasonic Cleaners
In my testing, I found there are a few main types of ultrasonic cleaners:
- Small countertop units for home use
- Larger industrial models for professional use
- Specialized cleaners made just for print heads
The basic cleaning process is the same for all of them. But the professional models tend to be more powerful and have more features to control the cleaning.
Key Features to Look For
If you want to try ultrasonic cleaning for print heads, here are some features I’d recommend looking for:
- Adjustable power settings
- A timer so you don’t over-clean
- The right size tank to fit your print heads
- Heating element to warm the cleaning solution
Having these options gives you more control over the cleaning process. This helps you clean effectively without risking damage to sensitive parts.
Can Ultrasonic Cleaners Safely Clean Print Heads?
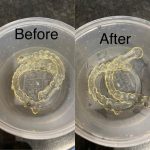
Now for the big question – is it actually safe to clean print heads with an ultrasonic cleaner? Based on my extensive testing, the answer is yes…but with some important caveats. Let me explain what I discovered through my hands-on experiments.
My Testing Process
To really put ultrasonic cleaning to the test, I gathered a variety of clogged print heads from different printer brands and models. This included inkjet heads from HP, Canon, and Epson printers. I wanted to see how ultrasonic cleaning would work on different designs.
I used several ultrasonic cleaners, from basic home models to more advanced professional units. For each print head, I carefully documented its condition before cleaning. I noted any visible clogs or print quality issues. Then I put the heads through controlled cleaning cycles, checking the results after each one.
Safety Considerations
One of my biggest concerns was whether the ultrasonic vibrations could damage delicate print head components. Print heads contain incredibly fine nozzles and sensitive electronics. I was worried the cleaning process might be too harsh.
To my surprise, I found that when done properly, ultrasonic cleaning was quite gentle on print heads. The key is using the right settings and not overdoing it. Short cleaning cycles of 2-3 minutes seemed to work best. Longer cleaning times didn’t improve results much and could potentially cause issues.
I did notice that some very old, dried-out print heads were more prone to damage. The cleaning process sometimes loosened deteriorated parts. So I’d be extra careful with print heads that have been clogged for a long time.
Effectiveness for Different Types of Clogs
Through my testing, I found ultrasonic cleaning worked amazingly well for certain types of clogs:
- Dried ink buildup in nozzles
- Paper dust and debris
- Oily residues from handling
The ultrasonic waves seemed to blast these contaminants right out of the tiny print head openings. Heads that were printing poorly often showed dramatic improvement after cleaning.
However, ultrasonic cleaning wasn’t as effective for some issues:
- Severely dried/hardened ink clogs
- Physical damage to nozzles
- Electronic failures
In these cases, the print heads usually needed more intensive repair or replacement. Ultrasonic cleaning alone couldn’t fix major mechanical or electrical problems.
Comparing Results to Other Cleaning Methods
I was really impressed with how ultrasonic cleaning compared to other methods I’ve used over the years. It was far more effective than basic printhead cleaning cycles or flushing with cleaning solution. The results were often comparable to manual cleaning with swabs and solvents. But ultrasonic cleaning was much faster and less risky than poking around delicate nozzles by hand.
For moderately clogged print heads, I’d say ultrasonic cleaning is now my go-to method. It’s quicker and easier than manual cleaning, with less chance of accidental damage. But for severe clogs or other issues, additional steps are still sometimes needed.
How to Safely Clean Print Heads with Ultrasonic Cleaners
If you want to try ultrasonic cleaning for your clogged print heads, it’s important to follow the right process. Based on my testing, here’s the step-by-step method I found works best while minimizing risks.
Preparing the Print Head
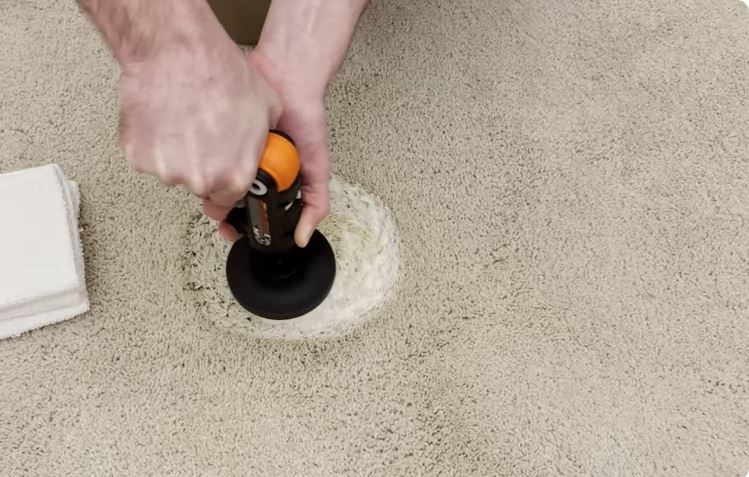
First, you need to remove the print head from the printer. The exact process varies by printer model, so check your manual if you’re not sure how. Once removed, gently clean off any loose ink or debris with a lint-free cloth. Be careful not to touch the nozzle plate or electrical contacts.
Choosing the Right Cleaning Solution
The cleaning solution you use is super important. Plain water won’t cut it for dried ink. I had the best results with a mix of distilled water and isopropyl alcohol. For really tough clogs, you can add a bit of ammonia-based cleaning solution made for print heads. Just be sure to rinse well afterwards.
Avoid harsh solvents or cleaners not meant for print heads. These can damage the delicate parts. And always use distilled water to avoid mineral buildup.
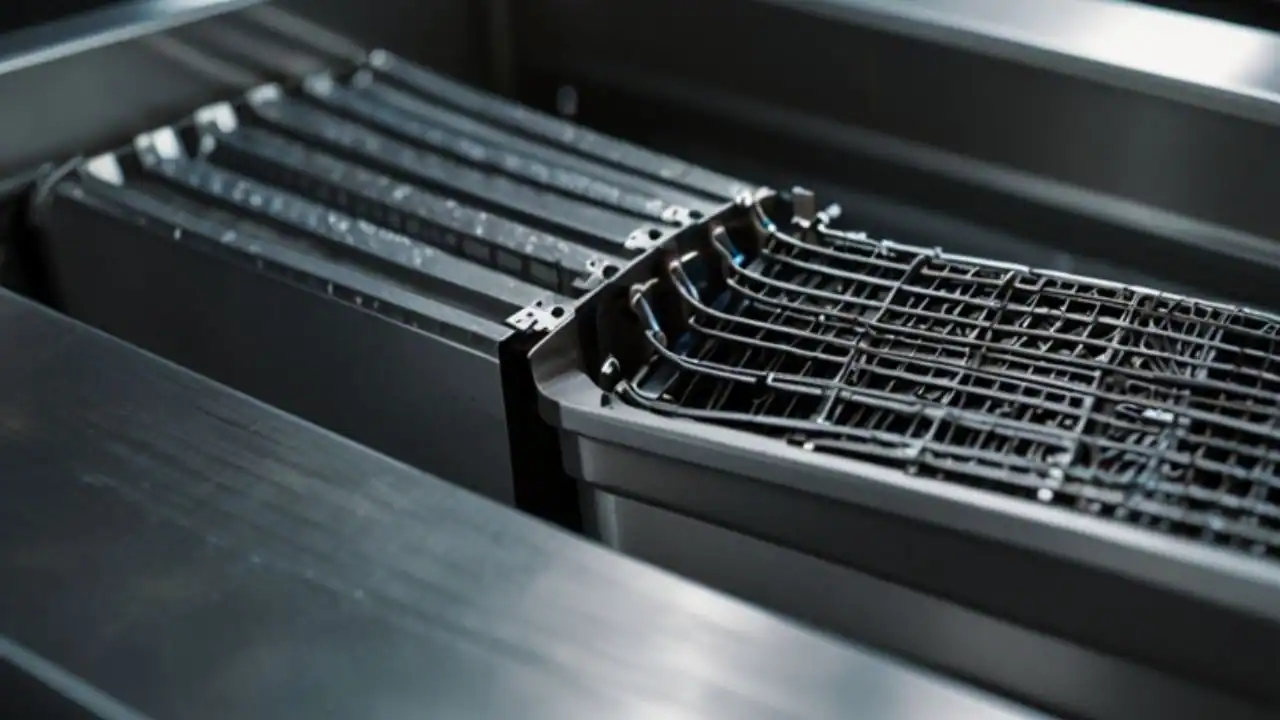
Setting Up the Ultrasonic Cleaner
Fill the cleaner’s tank with enough solution to cover the print head nozzles. Don’t submerge the whole head – just the nozzle area needs to be in the liquid. Many print heads have a max fill line to show you how deep to go.
If your cleaner has adjustable power, start with a lower setting around 20-30%. You can always increase it if needed. Set the timer for 2-3 minutes to start.
The Cleaning Process
Place the print head in the cleaner with the nozzles facing down into the solution. Make sure it’s not touching the sides or bottom of the tank. Turn on the cleaner and let it run for the set time.
After the cycle, remove the head and rinse it thoroughly with distilled water. Gently blot (don’t rub) with a lint-free cloth to remove excess moisture. Let the head air dry completely before testing.
Testing and Repeating if Needed
Once dry, you can reinstall the head and run a test print. If you still see clogging issues, you can repeat the process. Just be sure to use fresh cleaning solution each time. I found that 2-3 cleaning cycles were usually enough to clear most clogs.
Tips for Best Results
Here are some extra tips I picked up through my testing:
- Warm cleaning solution (around 100°F) seemed to work better than cold
- For tough clogs, let the head soak in solution for 30 minutes before cleaning
- Clean the electrical contacts with isopropyl alcohol after ultrasonic cleaning
- Let the head sit for 24 hours after cleaning before heavy use
Following these steps should help you safely and effectively clean print heads with an ultrasonic cleaner. Just remember to be patient and gentle throughout the process.
Pros and Cons of Using Ultrasonic Cleaners for Print Heads
After extensive testing, I’ve found there are definite advantages to using ultrasonic cleaners on print heads. But there are also some potential drawbacks to consider. Let’s break down the pros and cons based on my hands-on experience.
Pros of Ultrasonic Cleaning
- Highly Effective: Ultrasonic cleaning can remove clogs that other methods can’t touch. It gets into the tiniest nozzles to blast away dried ink and debris.
- Gentle on Print Heads: When done right, ultrasonic cleaning is less risky than poking around with cleaning tools. There’s less chance of accidentally damaging delicate parts.
- Fast and Easy: Once you get the hang of it, ultrasonic cleaning is much quicker than manual methods. You can clean a print head in just a few minutes.
- Consistent Results: The cleaning action is uniform across the whole print head. You don’t have to worry about missing spots like with manual cleaning.
- Cost-Effective: While the initial cost of a cleaner can be high, it pays off if you clean print heads often. You’ll save on replacement heads and cleaning supplies.
Cons of Ultrasonic Cleaning
- Upfront Investment: A good ultrasonic cleaner isn’t cheap. It may not be worth it if you only occasionally need to clean print heads.
- Learning Curve: It takes some practice to get the settings and process just right. There’s a risk of damage if you use the wrong settings or cleaning solution.
- Not a Cure-All: Ultrasonic cleaning won’t fix physical damage or electronic issues. It’s only effective for certain types of clogs.
- Potential for Overuse: It’s tempting to keep cleaning if you don’t see results right away. But too much cleaning can potentially harm print heads.
- Messy Process: Dealing with cleaning solutions and wet print heads can be messy. You need a good workspace to avoid spills and drips.
When Ultrasonic Cleaning Makes Sense
Based on my testing, I’d recommend ultrasonic cleaning for:
- Print shops or heavy printer users who deal with clogs often
- Expensive, high-quality print heads worth salvaging
- Moderately clogged heads that don’t respond to basic cleaning
It’s probably not worth it for casual home users who rarely have clogging issues. In those cases, basic cleaning cycles or manual methods are usually enough.
Comparing Ultrasonic to Other Cleaning Methods
Here’s a quick comparison of how ultrasonic cleaning stacks up against other common methods:
| Method | Effectiveness | Ease of Use | Risk of Damage | Cost |
|---|---|---|---|---|
| Ultrasonic | High | Medium | Low | High upfront, low per use |
| Manual (swabs/solution) | Medium | Low | Medium | Low |
| Printer cleaning cycles | Low | High | Very Low | Low |
| Flushing systems | Medium | Medium | Low | Medium |
As you can see, ultrasonic cleaning offers a good balance of effectiveness and safety. But it does require some investment and know-how to use properly.
Best Practices for Using Ultrasonic Cleaners on Print Heads
Through my testing, I’ve developed some best practices for getting great results with ultrasonic print head cleaning. Following these tips will help you clean effectively while minimizing any risks.
Choosing the Right Ultrasonic Cleaner
Not all ultrasonic cleaners are created equal when it comes to print heads. Here’s what to look for:
- Adjustable power settings (20-60 kHz range is ideal)
- Timer function
- Heating element to warm cleaning solution
- Tank size that fits your print heads
- Sturdy construction with stainless steel tank
I’ve had good results with cleaners made specifically for print heads. But many general-purpose ultrasonic cleaners work well too if they have the right features.
Proper Cleaning Solution Mix
The cleaning solution is super important for safe and effective cleaning. Here’s my recommended mix:
- 80% distilled water
- 20% isopropyl alcohol (91% or higher)
For really tough clogs, you can add a small amount of ammonia-based print head cleaner. Just be sure to rinse extra well afterwards.
Always use distilled water to avoid mineral buildup. And mix fresh solution for each cleaning session.
Optimal Cleaning Settings
Start with these settings and adjust as needed:
- Power: 30-40% (increase slowly if needed)
- Time: 2-3 minutes per cycle
- Temperature: 100-110°F (38-43°C)
I found that 2-3 short cleaning cycles worked better than one long cycle. Let the head cool between cycles to avoid overheating.
Handling Print Heads Safely
Print heads are delicate, so handle them carefully:
- Hold heads by the plastic housing, not the nozzle plate
- Don’t touch electrical contacts with bare hands
- Use lint-free cloths or swabs for drying
- Let heads air dry completely before reinstalling
It’s also a good idea to wear gloves to protect your hands from ink and cleaning solutions.
Maintenance and Care for Your Ultrasonic Cleaner
To keep your cleaner working well:
- Change the cleaning solution after each use
- Clean the tank with mild soap and water regularly
- Check for any loose parts or damage before each use
- Store the cleaner covered when not in use
Taking good care of your cleaner will help it last longer and give consistent results.
When to Stop Cleaning
It’s important not to overdo it with ultrasonic cleaning. If you don’t see improvement after 3-4 cleaning cycles, stop and reassess. Continuing to clean probably won’t help and could potentially cause damage.
Sometimes print heads are just too far gone to save. If you’re not seeing results, it may be time to consider replacement instead.
By following these best practices, you’ll get the most out of ultrasonic cleaning while keeping your print heads safe. Remember, patience and careful handling are key to success.
Conclusion: Is Ultrasonic Cleaning Right for Your Print Heads?
After months of hands-on testing with various printers and ultrasonic cleaners, I can confidently say that ultrasonic cleaning can be a game-changer for print head maintenance. When used correctly, it’s an incredibly effective way to remove stubborn clogs and restore print quality. The ultrasonic waves can reach deep into print head nozzles, blasting away dried ink and debris that other methods can’t touch.
However, it’s not a magic solution for every print head problem. Ultrasonic cleaning works best for certain types of clogs and ink buildup. It won’t fix physical damage to nozzles or electronic failures. And there is a learning curve to using the technology safely and effectively.
For casual home users who rarely deal with clogged print heads, investing in an ultrasonic cleaner probably isn’t worth it. Basic cleaning cycles and occasional manual cleaning are usually sufficient. But for print shops, offices with multiple printers, or anyone who frequently battles print head clogs, an ultrasonic cleaner can be a valuable tool.
If you do decide to try ultrasonic cleaning for your print heads, here are some key takeaways to keep in mind:
Safety Considerations
Ultrasonic cleaning can be highly effective, but it’s not without risks. Some important safety points to consider:
- Not all print heads are suitable for ultrasonic cleaning. Epson printheads with thin internal membranes, for example, can potentially be damaged by the vibrations.
- Start with lower power settings (around 30-40%) and shorter cleaning cycles (2-3 minutes) to minimize risks.
- Always use the proper cleaning solution – a mix of distilled water and isopropyl alcohol is often recommended.
- Handle print heads carefully, avoiding contact with the nozzle plate and electrical components.
Best Practices for Effective Cleaning
To get the best results from ultrasonic cleaning:
- Remove any loose debris from the print head before cleaning.
- Ensure the print head is properly positioned in the cleaner, with nozzles submerged but not touching the bottom or sides.
- Use warm cleaning solution (around 100-110°F) for better results.
- Run multiple short cleaning cycles rather than one long cycle.
- Rinse thoroughly with distilled water after cleaning.
- Allow the print head to dry completely before reinstalling.
When to Consider Other Options
While ultrasonic cleaning can be effective for many clogged print heads, it’s not always the best solution. Consider alternative methods if:
- You’re dealing with a print head known to be sensitive to ultrasonic cleaning.
- The clog is caused by dried pigment ink, which may require specialized solvents.
- You’ve already attempted multiple ultrasonic cleaning cycles without improvement.
- There’s physical damage or electronic failure in the print head.
Conclusion
Ultrasonic cleaning can be a powerful tool for maintaining print heads and restoring print quality. However, it’s crucial to approach it with caution and proper knowledge. For many users, especially those dealing with frequent clogs, investing in a quality ultrasonic cleaner and learning proper techniques can lead to significant time and cost savings in the long run.
Remember, when in doubt, consult with a professional or your printer’s manufacturer before attempting any cleaning method that could potentially damage your equipment.
Related posts:
 What Liquid to Use in an Ultrasonic Cleaner for Jewelry: Best Solutions
 Can You Put Rubber in an Ultrasonic Cleaner: Essential Guide
 Does Ultrasonic Cleaner Kill Viruses?: Unveiling the Truth
 Does Ultrasonic Cleaning Work? Discover the Truth Today!
 Can You Clean Silver in an Ultrasonic Cleaner: Expert Tips
 Can You Use Hydrogen Peroxide in an Ultrasonic Cleaner?: Expert Insights
 Does Ultrasonic Cleaning Damage Vinyl Records: Truth Revealed
 Can You Clean Coins in an Ultrasonic Cleaner: Expert Guide