Cleaning a carburetor can seem hard. But using an ultrasonic cleaner makes it easier. This guide will help you understand the process. Also, how long it takes to clean a carburetor.
What is an Ultrasonic Cleaner?
An ultrasonic cleaner is a device. It uses sound waves to clean objects. These sound waves create tiny bubbles in a liquid. The bubbles help clean the dirt and grime off the carburetor.
Why Clean a Carburetor?
A carburetor mixes fuel and air for the engine. If it is dirty, the engine will not run well. Cleaning the carburetor helps the engine work better. It also makes your vehicle last longer.
Preparing the Carburetor for Cleaning
First, you need to remove the carburetor from the engine. Then, take it apart. Remove all small parts. Be careful not to lose any pieces. Place the parts in separate containers. This makes it easier to put back together later.
Steps To Take Apart The Carburetor
- Remove the fuel line
- Disconnect the throttle linkage
- Unscrew the mounting bolts
- Take off the carburetor from the engine
- Disassemble the carburetor parts
Using the Ultrasonic Cleaner
Now, you are ready to use the ultrasonic cleaner. Here are the steps to follow:
Step-by-step Process
- Fill the ultrasonic cleaner with water and cleaning solution.
- Place the carburetor parts in the cleaner’s basket.
- Set the temperature to the recommended setting.
- Turn on the cleaner and set the timer.
The time needed can vary. Usually, it takes around 20 to 30 minutes. But, some carburetors may need more time. If the parts are very dirty, you may need to run the cleaner for up to an hour.
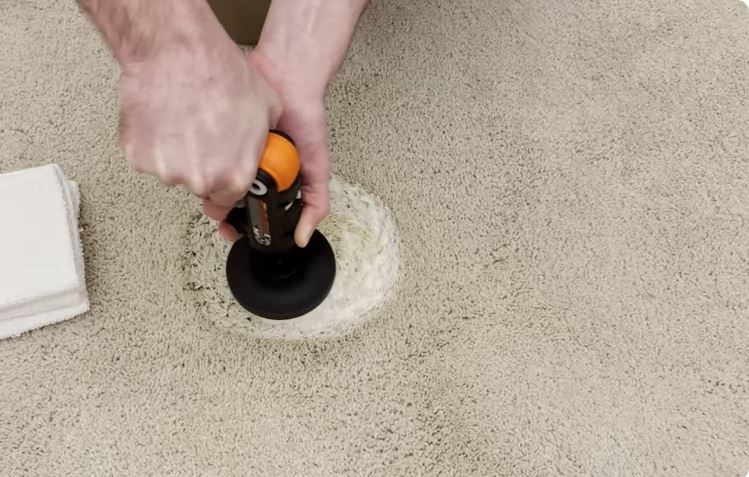
Monitoring the Cleaning Process
While the cleaner is running, check the parts. You can pause the cleaner and look at the carburetor parts. If they are still dirty, continue the cleaning process.

Credit: www.youtube.com
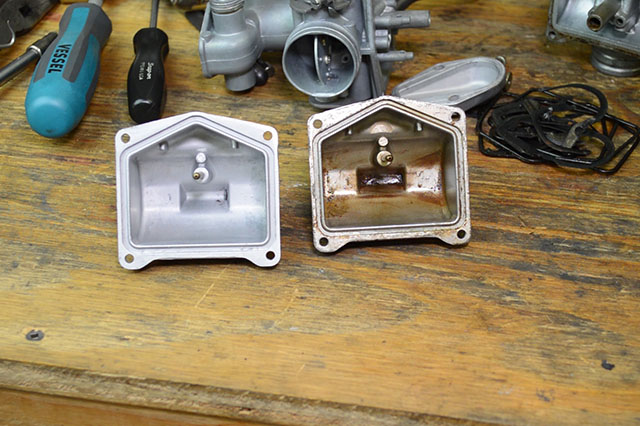
After Cleaning
Once the parts are clean, remove them from the cleaner. Rinse them with clean water. This removes any leftover cleaning solution. Then, let the parts dry completely. Use a soft cloth or let them air dry.

Credit: www.instructables.com
Reassembling the Carburetor
Now, put the carburetor back together. Follow the steps in reverse order. Make sure all parts are in the right place. Tighten all screws and bolts. Once done, reattach the carburetor to the engine.
Steps To Reassemble The Carburetor
- Place the parts back in their original positions
- Secure the mounting bolts
- Reconnect the throttle linkage
- Attach the fuel line
Testing the Carburetor
After reassembling, it is important to test the carburetor. Start the engine. Listen to how it runs. If the engine runs smoothly, the cleaning was successful. If not, check for any issues.
Tips for Better Cleaning
Here are some tips to get the best results:
- Use the right cleaning solution
- Set the correct temperature
- Do not overcrowd the cleaner
- Check the parts regularly
- Rinse and dry the parts properly
Frequently Asked Questions
How Long Does It Take To Clean A Carburetor In An Ultrasonic Cleaner?
Cleaning a carburetor in an ultrasonic cleaner usually takes around 20-30 minutes.
Can I Clean A Carburetor Without Removing It?
No, you must remove the carburetor to clean it properly in an ultrasonic cleaner.
What Solution Should I Use In The Ultrasonic Cleaner?
Use a specialized ultrasonic cleaning solution designed for carburetors and metal parts.
Is Ultrasonic Cleaning Safe For Carburetors?
Yes, ultrasonic cleaning is safe and effective for removing dirt and grime from carburetors.
Conclusion
Cleaning a carburetor with an ultrasonic cleaner is effective. It usually takes 20 to 30 minutes. Sometimes longer if the parts are very dirty. Follow the steps and tips for the best results. A clean carburetor helps your engine run better. Happy cleaning!
Related posts:
 How to Use an Ultrasonic Jewelry Cleaner: Step-by-Step Instructions
 Can You Put Rubies in an Ultrasonic Cleaner: Expert Advice
 Can You Clean Makeup Brushes in an Ultrasonic Cleaner: Expert Tips
 How to Clean a Carburetor With an Ultrasonic Cleaner: Expert Tips
 Does an Ultrasonic Cleaner Kill Bacteria: Discover the Truth
 What Liquid to Use in an Ultrasonic Cleaner for Carburetors: Ultimate Guide
 Can I Clean My Diamond Ring in an Ultrasonic Cleaner Safely?
 What Fluid to Use in an Ultrasonic Cleaner: Expert Recommendations