Ultrasonic cleaners are great tools. They clean small and delicate items. Jewelry, glasses, and watches become sparkling clean. You can make your own ultrasonic cleaner at home. This guide will show you how.
What is an Ultrasonic Cleaner?
An ultrasonic cleaner uses sound waves. These waves create tiny bubbles. The bubbles clean items gently. This method is very effective. It is also safe for delicate items.

Credit: www.youtube.com
Why Build Your Own Ultrasonic Cleaner?
Building your own cleaner can save money. It also gives you a fun project. You can learn new skills. Plus, you will have a useful tool at the end.
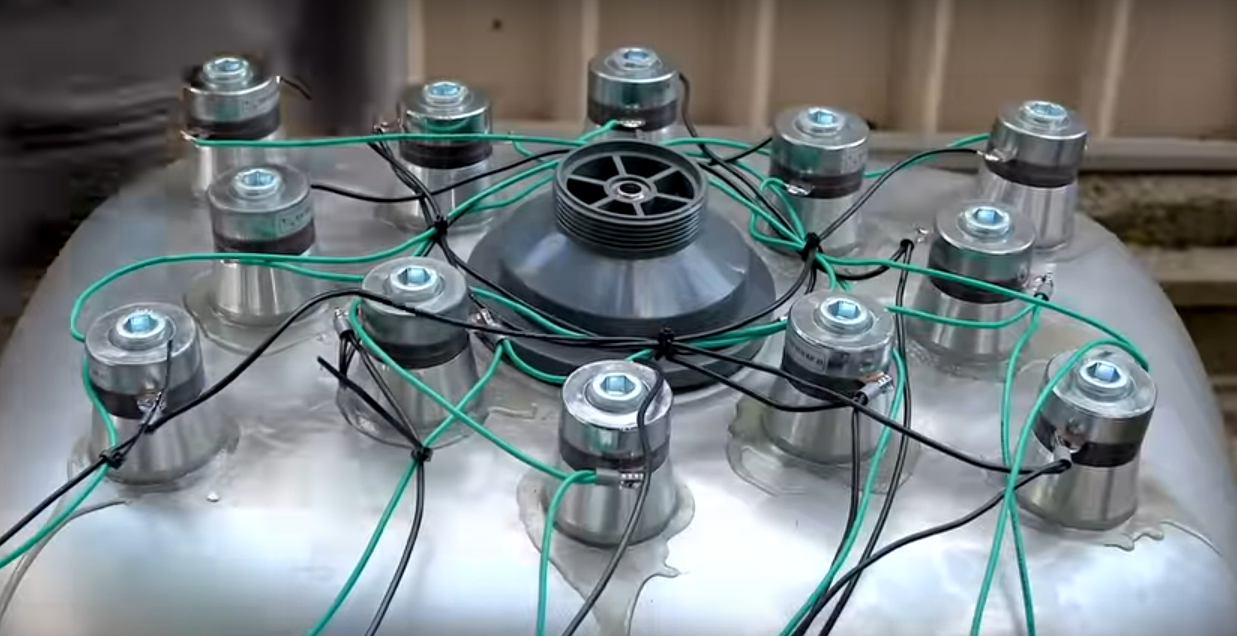
Credit: hackaday.com
What You Will Need
- A metal container (like a small stainless steel bowl)
- An ultrasonic transducer
- An ultrasonic driver circuit
- A power supply
- Soldering iron and solder
- Wires
- Glue (epoxy)
Steps to Build Your Ultrasonic Cleaner
Step 1: Prepare The Container
First, choose a metal container. It should be small and made of stainless steel. Clean the container well. This will be the tank for your cleaner.
Step 2: Attach The Ultrasonic Transducer
The transducer is the heart of the cleaner. It creates the sound waves. Attach it to the bottom of the container. Use epoxy glue to secure it. Make sure it is firmly in place.
Step 3: Connect The Ultrasonic Driver Circuit
The driver circuit powers the transducer. Connect the transducer to the driver circuit. Use wires to make the connection. Solder the wires for a strong bond. Be careful while soldering. Follow the circuit diagram provided with the driver circuit.
Step 4: Power Supply
Next, connect the power supply. The power supply should match the requirements of the driver circuit. Attach the power supply to the driver circuit. Again, use wires and solder for the connections. Make sure all connections are secure.
Step 5: Test Your Ultrasonic Cleaner
Now, it is time to test your cleaner. Fill the container with water. Plug in the power supply. Turn on the driver circuit. You should see tiny bubbles in the water. These bubbles mean your cleaner is working.
Step 6: Use Your Ultrasonic Cleaner
Your cleaner is ready to use. Place small items in the water. Turn on the cleaner. Let it run for a few minutes. The items should come out clean. Remember to turn off the cleaner after use.
Tips for Using Your Ultrasonic Cleaner
- Always use water in the container.
- Do not overload the container with items.
- Use a small brush for stubborn dirt.
- Clean the container after each use.
- Keep the cleaner away from children.
Maintenance and Safety
Regular maintenance is important. Check all connections often. Make sure the transducer is secure. Clean the container after each use. Always unplug the power supply when not in use. Follow safety guidelines while soldering and handling electronics.
Frequently Asked Questions
What Materials Do I Need To Build An Ultrasonic Cleaner?
You need a transducer, container, power supply, and cleaning solution.
How Does An Ultrasonic Cleaner Work?
It uses high-frequency sound waves to create tiny bubbles that clean surfaces.
Can I Use Tap Water In My Ultrasonic Cleaner?
Yes, but distilled water is better for preventing mineral buildup.
How Long Should Items Stay In The Ultrasonic Cleaner?
Typically, 5 to 10 minutes is enough for most items.
Conclusion
Building an ultrasonic cleaner is a rewarding project. It is not too difficult. You need basic tools and materials. Follow the steps carefully. You will have a useful cleaner at the end. Enjoy your new ultrasonic cleaner!
Additional Resources
Here are some resources to help you:
- Ultrasonic Cleaning – Wikipedia
- DIY Ultrasonic Cleaner – YouTube Video
- Ultrasonic Cleaning – ScienceDirect
Related posts:
 Can You Put Sterling Silver in an Ultrasonic Cleaner? Expert Tips
 Can You Clean a Rolex in an Ultrasonic Cleaner: Ultimate Guide
 Can You Clean Silver in an Ultrasonic Cleaner: Expert Tips
 Can You Use Ultrasonic Cleaner on Glasses?: Ultimate Guide
 Can You Use Tap Water in an Ultrasonic Cleaner: Essential Tips
 What is Ultrasonic Cleaning: The Ultimate Guide to Sparkling Clean
 How Long to Leave Jewelry in an Ultrasonic Cleaner: Expert Tips
 How to Clean Jewelry in an Ultrasonic Cleaner: Ultimate Guide