As a jewelry lover, I’ve always been fascinated by the sparkle and shine of my favorite pieces. But over time, I noticed that my beloved rings, necklaces, and earrings started to lose their luster. That’s when I discovered the magic of ultrasonic cleaning solutions for jewelry. I want to share my experience and guide you through the process of making your own DIY ultrasonic cleaning solution at home.
I remember the first time I saw my grandmother’s wedding ring after she cleaned it with an ultrasonic cleaner. It looked brand new, as if it had just come from the jewelry store. I was amazed and wanted to learn how to achieve the same results with my own jewelry collection.
After some research and experimentation, I found that making an ultrasonic cleaning solution at home is not only easy but also cost-effective. You don’t need to spend a fortune on expensive commercial cleaners when you can create your own using simple ingredients from your kitchen.
In this guide, I’ll walk you through the steps I took to make my own ultrasonic cleaning solution for jewelry. I’ll share the ingredients I used, the process I followed, and the results I achieved. I’ll also provide some tips and tricks I learned along the way to help you get the best results for your precious jewelry.
Whether you’re a jewelry enthusiast like me or simply want to keep your favorite pieces looking their best, this guide will help you create an effective ultrasonic cleaning solution right in your own home. Let’s get started on this exciting journey to bring back the shine to your jewelry!
Understanding Ultrasonic Cleaning
Before we dive into making our own ultrasonic cleaning solution, it’s important to understand how ultrasonic cleaning works. When I first heard about this method, I was curious about the science behind it.
Ultrasonic cleaning uses high-frequency sound waves to create tiny bubbles in a liquid solution. These bubbles then collapse, creating a powerful scrubbing action that reaches even the tiniest crevices in your jewelry. This process is called cavitation.
I was amazed to learn that these sound waves are so high-pitched that human ears can’t hear them. But they’re powerful enough to remove dirt, grime, and even tarnish from jewelry without causing any damage.
The key to effective ultrasonic cleaning is using the right solution. While water alone can work, adding certain ingredients can enhance the cleaning power and help remove stubborn dirt and oils.
Why Make Your Own Ultrasonic Cleaning Solution?
You might wonder why I chose to make my own ultrasonic cleaning solution instead of buying a commercial one. There are several reasons why I prefer the DIY approach:
Cost-effective: Making your own solution is much cheaper than buying pre-made ones. I found that I could clean my jewelry multiple times with homemade solution for the price of one small bottle of commercial cleaner.
Control over ingredients: By making my own solution, I know exactly what’s going into it. This is especially important if you have sensitive skin or allergies.
Environmentally friendly: Many homemade solutions use natural ingredients that are better for the environment than harsh chemicals found in some commercial cleaners.
Customizable: I can adjust the recipe based on the type of jewelry I’m cleaning or how dirty it is.
Always available: With a homemade solution, I never run out of cleaner. I can whip up a new batch whenever I need it.
Ingredients for DIY Ultrasonic Cleaning Solution
When I first started making my own ultrasonic cleaning solution, I was surprised by how simple the ingredients were. Here’s what I use:
- Distilled water
- Dish soap (mild and unscented)
- Ammonia (optional, for extra cleaning power)
- White vinegar (optional, for removing tarnish)
I always make sure to use distilled water because it doesn’t contain any minerals that could leave residue on my jewelry. For dish soap, I choose a mild, unscented variety to avoid any potential reactions with the jewelry.
The ammonia and white vinegar are optional ingredients that I use depending on the condition of my jewelry. Ammonia provides extra cleaning power for very dirty pieces, while white vinegar helps remove tarnish from silver jewelry.
Step-by-Step Guide to Making Ultrasonic Cleaning Solution
Now, let’s get into the actual process of making the ultrasonic cleaning solution. I’ll guide you through the steps I follow:
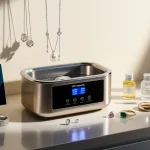
- Start with distilled water: I fill my ultrasonic cleaner tank about 2/3 full with distilled water.
- Add dish soap: I squeeze in a few drops of mild, unscented dish soap. Usually, about 1-2 drops per cup of water is enough.
- Optional ingredients: If I’m cleaning very dirty jewelry or silver pieces, I might add a small amount of ammonia or white vinegar. I use about 1 tablespoon per cup of water.
- Mix gently: I stir the solution carefully to mix all the ingredients. It’s important not to create too many bubbles, as these can interfere with the ultrasonic cleaning process.
- Test the solution: Before putting in my jewelry, I always test the solution on a small, inconspicuous piece to make sure it doesn’t cause any damage.
Remember, the exact proportions might vary depending on how dirty your jewelry is and what type of jewelry you’re cleaning. Don’t be afraid to experiment a little to find what works best for you.
Using Your Homemade Ultrasonic Cleaning Solution
Once I’ve made my cleaning solution, it’s time to use it. Here’s how I do it:
- Place jewelry in the cleaner: I make sure my jewelry pieces aren’t touching each other to prevent scratching.
- Set the timer: Most ultrasonic cleaners have a timer. I usually set mine for about 2-3 minutes for lightly soiled pieces, and up to 5-6 minutes for dirtier items.
- Run the cleaner: I turn on the ultrasonic cleaner and let it do its magic.
- Rinse thoroughly: After cleaning, I rinse my jewelry with clean, distilled water to remove any remaining solution.
- Dry carefully: I pat my jewelry dry with a soft, lint-free cloth.
Types of Jewelry Safe for Ultrasonic Cleaning
Through my experience, I’ve learned that not all jewelry is suitable for ultrasonic cleaning. Here’s a quick overview of what I’ve found to be safe:
| Safe for Ultrasonic Cleaning | Not Safe for Ultrasonic Cleaning |
|---|---|
| Gold (10k, 14k, 18k) | Pearls |
| Platinum | Opals |
| Diamond | Emeralds |
| Sapphire | Tanzanite |
| Ruby | Costume jewelry |
| Most cubic zirconia | Antique jewelry |
I always make sure to check if my jewelry has any loose stones before cleaning, as the ultrasonic vibrations could dislodge them.
Tips for Best Results
Over time, I’ve picked up some tips that help me get the best results from my homemade ultrasonic cleaning solution:
- Clean regularly: I find that cleaning my jewelry every few weeks prevents build-up and makes the cleaning process easier.
- Pre-soak: For very dirty pieces, I sometimes soak them in warm, soapy water before ultrasonic cleaning.
- Change solution: I always use fresh solution for each cleaning session to ensure the best results.
- Avoid overheating: If my jewelry feels warm after cleaning, I let it cool before rinsing to prevent thermal shock.
- Professional check: Even with regular cleaning at home, I still take my valuable pieces to a jeweler for professional cleaning and inspection once a year.
Precautions and Safety Measures
Safety is always my top priority when cleaning jewelry. Here are some precautions I take:
- I always wear gloves when handling cleaning solutions, especially if I’m using ammonia.
- I make sure to work in a well-ventilated area to avoid inhaling any fumes.
- I keep my cleaning solutions out of reach of children and pets.
- If I’m unsure about cleaning a particular piece of jewelry, I consult a professional jeweler.
- I never mix ammonia and vinegar, as this can create harmful fumes.
Alternatives to Homemade Solutions
While I love my homemade ultrasonic cleaning solution, I understand it might not be for everyone. Here are some alternatives I’ve tried:
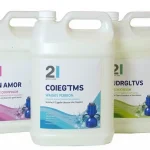
- Commercial ultrasonic cleaning solutions: These are specially formulated for jewelry cleaning and can be purchased online or at jewelry stores.
- Professional cleaning: For valuable or delicate pieces, professional cleaning by a jeweler is often the safest option.
- Gentle hand cleaning: For pieces that can’t be ultrasonically cleaned, I use a soft brush and mild soap solution.
Maintaining Your Jewelry Between Cleanings
Even with regular ultrasonic cleaning, I find that taking care of my jewelry between cleanings helps maintain its sparkle. Here’s what I do:
- I store my jewelry properly in a dry place, away from direct sunlight.
- I remove my jewelry before showering, swimming, or applying lotions and perfumes.
- I wipe my jewelry with a soft cloth after wearing to remove any oils or sweat.
- For silver jewelry, I use anti-tarnish strips in my storage boxes to prevent tarnishing.
Troubleshooting Common Issues
Sometimes, things don’t go as planned. Here are some issues I’ve encountered and how I solved them:
- Cloudy residue: If I notice a cloudy residue on my jewelry after cleaning, I rinse it more thoroughly and dry it carefully.
- Discoloration: If any piece shows signs of discoloration after cleaning, I stop using that solution on that type of jewelry and consult a jeweler.
- Loose stones: If I notice any loose stones after cleaning, I take the piece to a jeweler for repair immediately.
The Environmental Impact of Homemade Cleaning Solutions
One aspect of making my own ultrasonic cleaning solution that I really appreciate is its lower environmental impact compared to commercial cleaners. Here’s why:
- Fewer chemicals: My homemade solution uses simple, biodegradable ingredients that are less harmful to the environment.
- Less packaging waste: By making my own solution, I avoid the plastic bottles and packaging that come with commercial cleaners.
- Lower carbon footprint: Homemade solutions don’t require transportation from factories to stores, reducing their carbon footprint.
Cost Comparison: Homemade vs. Commercial Solutions
When I first started making my own ultrasonic cleaning solution, I was curious about how much money I was saving. Here’s a rough comparison based on my experience:
| Homemade Solution (per liter) | Commercial Solution (per liter) |
|---|---|
| Distilled water: $0.50 | Average price: $20-$30 |
| Dish soap: $0.10 | |
| Ammonia/Vinegar: $0.20 | |
| Total: $0.80 | Total: $20-$30 |
As you can see, the cost difference is significant. I found that I could make about 25 liters of homemade solution for the price of one liter of commercial solution!
The Science Behind Ultrasonic Cleaning
I’ve always been fascinated by the science behind ultrasonic cleaning. Here’s what I’ve learned:
Ultrasonic cleaners typically operate at frequencies between 20-400 kHz. These high-frequency sound waves create alternating high and low pressure in the cleaning solution.
During the low-pressure stage, millions of microscopic bubbles form in the solution. When the high-pressure stage hits, these bubbles implode, releasing energy that dislodges dirt and grime from the jewelry.
This process, called cavitation, allows the cleaning solution to reach even the tiniest crevices in your jewelry, providing a deep clean that’s hard to achieve with manual cleaning methods.
Adapting the Solution for Different Types of Jewelry
Over time, I’ve learned to adjust my cleaning solution based on the type of jewelry I’m cleaning. Here’s what I’ve found works best:
For gold jewelry: I use my basic solution of distilled water and mild dish soap. This is usually sufficient to remove everyday dirt and oils.
For silver jewelry: I add a small amount of white vinegar to my basic solution. The acidity helps remove tarnish and restore shine.
For platinum jewelry: I use the basic solution, but I’m extra careful with the cleaning time as platinum can be softer than other metals.
For gemstone jewelry: I’m very cautious with gemstones. For hard stones like diamonds, sapphires, and rubies, I use the basic solution. For softer stones, I often opt for gentle hand cleaning instead.
Storing Your Homemade Ultrasonic Cleaning Solution
One question I often get is whether you can make a large batch of cleaning solution and store it for future use. Here’s what I’ve learned:
- Short-term storage: If I make a little extra solution, I can store it in a clean, airtight container for up to a week.
- Long-term storage: I don’t recommend storing the mixed solution for long periods. The ingredients can separate or degrade over time.
- Storing ingredients separately: Instead of storing the mixed solution, I keep my ingredients on hand so I can quickly mix up a fresh batch when needed.
- Labeling: If I do store any solution, I always label the container with the contents and date of preparation.
The Importance of Proper Drying
After cleaning my jewelry, I’ve found that proper drying is crucial. Here’s my drying process:
- Initial shake: I gently shake off excess water from my jewelry.
- Soft cloth: I use a soft, lint-free cloth to pat the jewelry dry.
- Air drying: I let my jewelry air dry completely before storing it.
- Avoid heat: I never use heat (like a hairdryer) to dry my jewelry as it can damage certain gemstones.
- Inspect: While drying, I take the opportunity to inspect my jewelry for any issues like loose stones.
Cleaning Your Ultrasonic Cleaner
To ensure my homemade solution works effectively, I make sure to keep my ultrasonic cleaner clean. Here’s how I do it:
- After each use: I empty the tank and rinse it thoroughly with clean water.
- Weekly cleaning: Once a week, I fill the tank with clean water and a drop of dish soap, run it for a few minutes, then rinse thoroughly.
- Deep cleaning: Every few months, I run a cleaning cycle with a mixture of water and white vinegar to remove any mineral deposits.
- Drying: I always dry the tank thoroughly after cleaning to prevent any mold or mildew growth.
Conclusion
Making your own ultrasonic cleaning solution for jewelry at home is a simple, cost-effective, and environmentally friendly way to keep your precious pieces sparkling. Through my experience, I’ve found that with just a few simple ingredients and some care, you can achieve professional-level results right in your own home.
Remember, the key to successful jewelry cleaning is understanding your pieces and treating them with care. Always err on the side of caution, and when in doubt, consult a professional jeweler.
I hope this guide helps you bring new life to your jewelry collection. Happy cleaning!
FAQ
- How often should I clean my jewelry with an ultrasonic cleaner?
Based on my experience, I clean my everyday jewelry about once a month. For pieces I wear less frequently, I clean them before and after wearing. However, the frequency can depend on how often you wear the jewelry and what activities you do while wearing it.
- Can I use regular tap water instead of distilled water in my ultrasonic cleaning solution?
While you can use tap water, I’ve found that distilled water gives better results. Tap water can contain minerals that may leave residue on your jewelry. Distilled water is pure and leaves your jewelry sparkling clean.
- Is it safe to clean all types of gemstones in an ultrasonic cleaner?
No, not all gemstones are safe for ultrasonic cleaning. In my experience, hard gemstones like diamonds, sapphires, and rubies are generally safe. However, softer or more porous stones like pearls, opals, and emeralds can be damaged by ultrasonic cleaning. Always check with a jeweler if you’re unsure.
- How long should I run the ultrasonic cleaner for each piece of jewelry?
I usually run my ultrasonic cleaner for about 2-3 minutes for lightly soiled pieces, and up to 5-6 minutes for dirtier items. However, it’s important not to overclean, as this can potentially damage your jewelry.
- Can I use this homemade solution in any ultrasonic cleaner?
In my experience, this homemade solution works well in most ultrasonic cleaners designed for jewelry. However, always check your cleaner’s manual for any specific solution requirements or restrictions.